For an overview of how GitHub actions operate, visit https://docs.github.com/en/actions/quickstart .
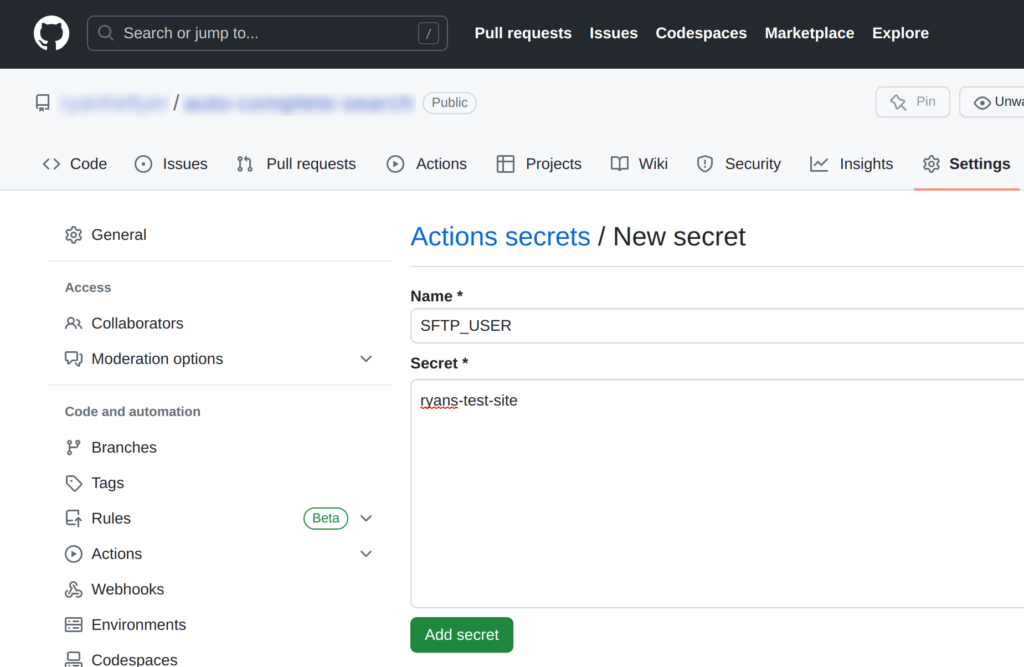
Deploying your site via GitHub actions is very straightforward. First of all, you need to head to the settings of your GitHub repository:

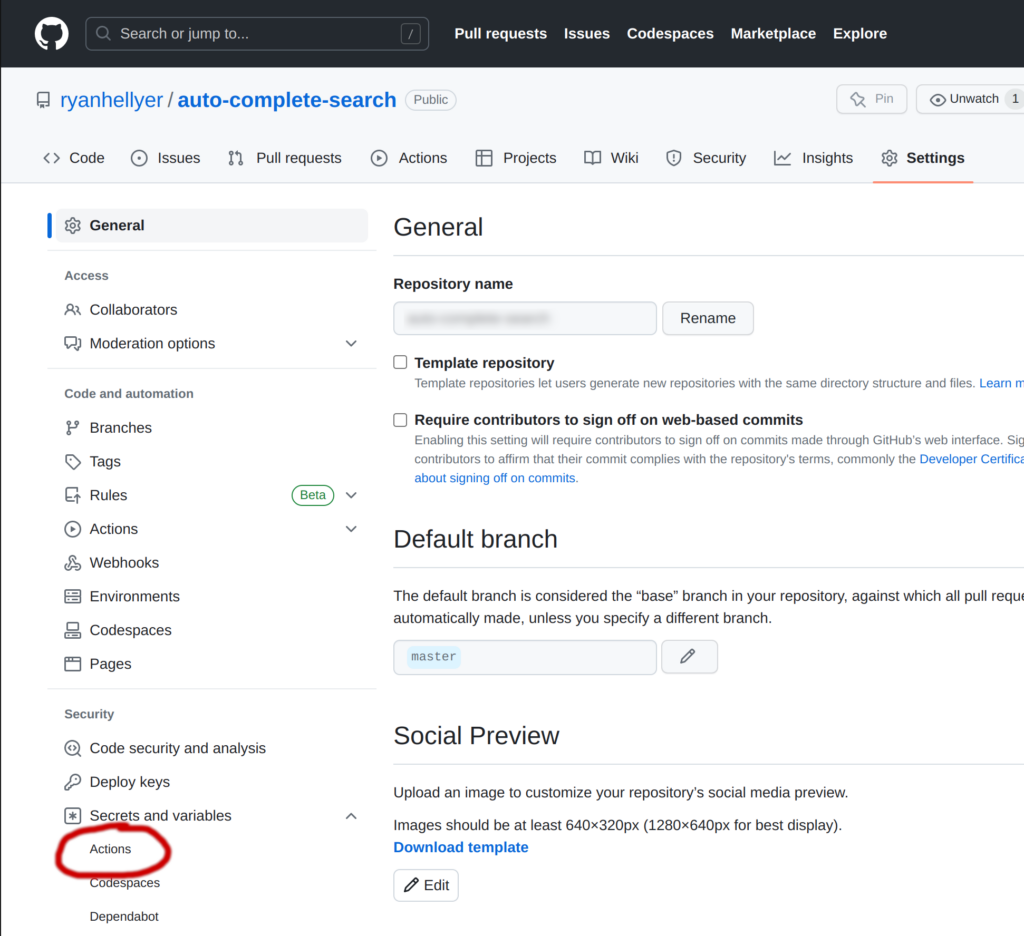
Then click on “Secrets and variables” to reveal the “Actions” option in the left hand menu, then click on “Actions” in the resulting pulldown.

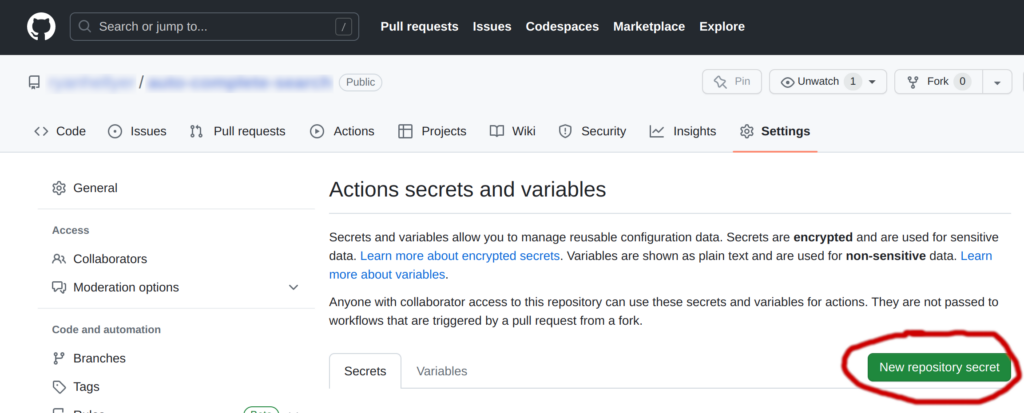
Then click on “New repository secret”.

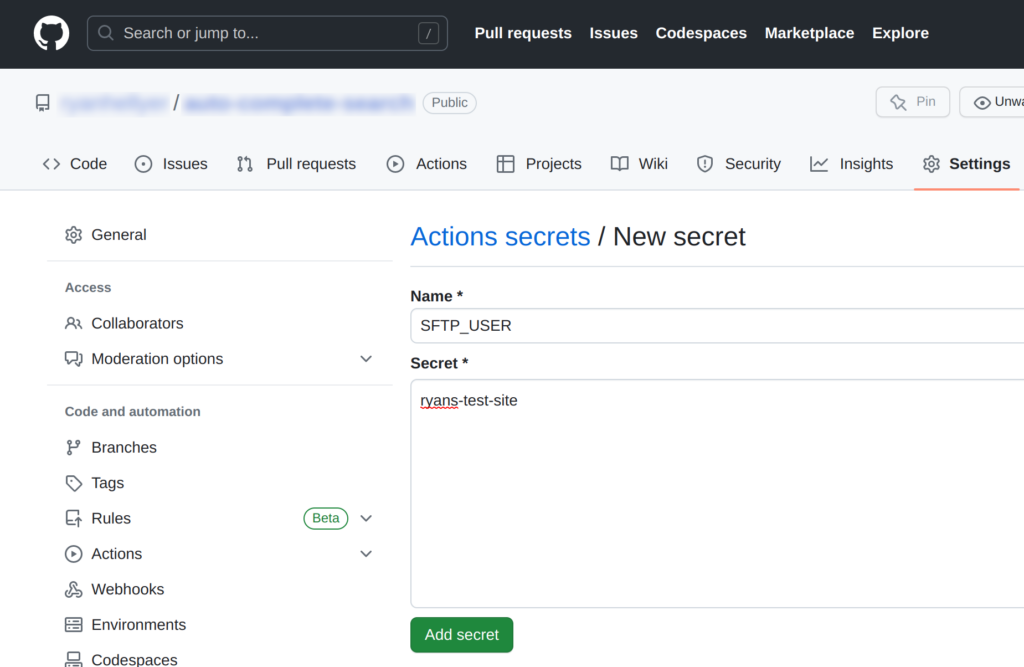
Then enter actions secrets for SFTP_USER, SFTP_PASSWORD, SFTP_HOST and SFTP_PORT. The values for these can be obtained from your Strattic console.

Finally, create the following file at /.github/workflows/deploy.yml and commit and push it to your repository. This should trigger an immediate deployment of the changed files to your site and all future commits will also trigger a deployment of the changed files to your Strattic site.
# This is a basic workflow to help you get started with Actions

name: "Deploy SFTP to Strattic"
# Controls when the workflow will run
on:
  # Triggers the workflow on push or pull request events but only for the master branch
  push:
    branches: [master]
  pull_request:
    branches: [master]
  # Allows you to run this workflow manually from the Actions tab
  workflow_dispatch:
# A workflow run is made up of one or more jobs that can run sequentially or in parallel
jobs:
  # This workflow contains a single job called "build"
  build:
    # The type of runner that the job will run on
    runs-on:
      ubuntu-latest
    steps:
      - name: "SFTP DEPLOY"
        uses: actions/checkout@v2
        with:
          fetch-depth: 0
      - name: "Deploy via SFTP"
        uses: milanmk/actions-file-deployer@master
        with:
          remote-protocol: "sftp"
          remote-host: ${{ secrets.SFTP_HOST }}
          remote-user: ${{ secrets.SFTP_USER }}
          remote-password: ${{ secrets.SFTP_PASSWORD }}
          remote-path: "/public_html/"
          sync: "delta" # or could be "delta" or "full"
Auto-publish
It is also possible to automatically publish your site via the Strattic publish API after a push to GitHub. Information about the Strattic publish API can be found at https://developers.strattic.com/doc/publish-api/.